Fiber Drum
Necklace
A Beadwrangler Workshop
| The Junction |
Workshop Index |
BeadArt Workshops |
NeedleArt Workshops |
FiberArt Workshops |
BeadCrochet Workshops |
| One day I was looking through my masses of corks and an idea zapped my beady brain! Drums! Why not make drums with corks? Their light weight makes them perfect to wear in a necklace or even use in wallhangings and sculptures. Wine corks are a perfect shape and size, but if you are not a wine connoisseur, you can get corks at craft stores or perhaps from one of your friends. These drums could also be used in children's school projects and for fun! |
Here are the supplies you will need.
First decide how long you want the necklace to be. To decide this, take a bead board and set all your natural beads equally on each side and leave spaces for the drums. You can check the last illustration in this project to see possible placement of drums and beads. Your necklace does not have to be symmetrical; the necklace shown is just an example. Many variations could be made from this technique. 30" is an average size necklace. You want it to be long enough to go over your head comfortably after you have finished making it. If all your bead holes are big, you can use yarns to string the whole piece and keep some of the yarn showing as decoration. If you have smaller bead holes, then you will want to use the carpet or Conso thread. Note: Yarn will give some and you might have to go back and add yarn to tighten up some areas. I find rayon and linen yarns to hold best.
I have made many different items covering corks. When you finish this project, try taking one cork, sewing the leather around the cork and on both ends and then just bead that cork all over. You can make all your necklace strands come directly from the cork because you can sew right onto the leather surrounding the cork. Make a group of thinner cork pieces and create a bracelet. The ideas are endless and the pieces are always lightweight. Try making earrings with the smaller pieces.
Now let's make those drums and have some fun!
![]()
To begin, you will need one dry wine cork or equivalent.
 Cut
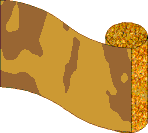
a piece of leather scrap so that it fits lengthwise and when wrapped around the cork meets
in a straight line. This is approximately 1 7/8" in width and 1 3/4" in length.
The piece will look rectangular. Use a permanent black marker to make dots or other animal
skin markings on the piece here and there.
 Take
another piece of leather in a different color or shade and cut two round pieces to fit on
each end of the cork. It should be wider than the circular size of each end of the cork;
1/2" added extra around each piece should be adequate.

Now, take the rectangular larger piece and wrap it around the cork lengthwise.

Match up the ends and pull them together tightly. Cut off any excess. Leather will stretch some so the piece needs to be taut around the cork. You can either hold the leather while you sew or use a very tiny amount of white glue on the cork to hold it while you sew it down.
![]()
You will need to put about 40" total length of sewing or Silamide thread on a sharps needle. Double the thread, put a knot in the end and sew the two edges of the leather together around the cork. Knot the end of the thread and cut off the excess. You can put a tiny dab of clear nail polish on the knot for added protection.
 The
two round leather pieces are now to be added. Cut a piece of Conso or carpet thread, about
20" and keep it single thread. Put a sewing needle on the thread and make a knot in
the opposite end of the thread, away from the needle. Take one piece of the circular
leather and put the needle through the leather near the edge. Pull the thread tight until
the knot is next to the leather.

Put this round piece on one end of the cork with the knot in the thread facing the cork.
![]()
Now take the other round piece of leather and set it on the other end of the cork.
 Hold both round pieces of leather in place with your hands. Take the needle
and pull the thread from the beginning round leather piece on one end to the other round
piece on the other end. You started with the thread coming from under the leather piece to
the outside; when you go to the second piece you will go through the outside of the piece
to the inside. This creates a woven form back and forth from the top piece to the bottom
piece.

Each time you go from one circular piece to the other, leave a little space between each stitch so it begins to look like a threaded drum.
![]()
When the thread is sewn all around the cork, tie a knot in one end near the round leather piece on the inside and then cut off excess thread. You can use clear nail polish on the end of the knot. Now you are ready to make the rest of the drums this size.
![]()
To make smaller drums, take a jeweler's saw and blade and cut a cork into two or four equal pieces. You can also use a power saw or dremel tool.
![]()
 If you
cut a wine cork into two pieces they will each be smaller than an inch. If you cut a wine
cork into four pieces they will each be smaller than a half inch in length.
![]()
![]() The two
pieces of cork would be covered the same way as the larger corks.
The two
pieces of cork would be covered the same way as the larger corks.

The smaller corks can be covered the same way or just covered with the animal leather on the side and each end. If you are going to cover them with just the animal print leather, do not sew a thick thread back and forth between the two ends. Instead cut exact size circles to fit each end of the short cork and sew them onto the piece that wraps around the side of the cork. It would be an exact fit over the cork and sewn together with sewing or Silamide thread.
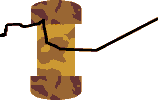
Once you have all the drum corks made, set them out on a bead board and add natural type beads between them such as nuts, ceramic and bone beads. Once you have your design, take your thicker thread and put it on a needle. It will be single thread. String on the beads and drums starting at the middle of the back of the necklace until you are at the other end. Next knot the thread together. Then make about three more knots on top of it. Take your Silamide thread and sharps needle, double your thread, about 30" total length and put a knot in it. Then sew back and forth through the knots on the thicker thread and tie off. Cut off the excess and put on a little clear nail polish for protection. This is your finished drum necklace. You could also use yarn, string the pieces and make big knots at the end of each yarn piece so you could leave the necklace open and tie it together in a knot or bow. Enjoy! I would love to see images of your creations and share them with our viewers.
| When you make copies of these
instructions to share with your friends, please tell them you got them at Beadwrangler's. |